
You don’t need to break the bank (or a limb) to create a home that feels both sophisticated and elegant. After all, luxury is less about the price tag and more about purpose, quality, and appearance. In recent months, a new wave of DIY enthusiasts and design lovers has emerged, championing the idea that beautiful interiors are well within reach—and often at the cost of next to nothing. With a clear vision and a bit of precision, it’s surprisingly easy to craft luxury DIY projects that could pass for something straight out of an upscale showroom.
In this article, we spotlight four luxury DIY projects that embody sophistication through simplicity. Each section introduces a project that embraces clean lines, classic beauty, and accessible materials—all chosen to mimic the look and feel of high-end design. From abstract paintings and faux marble finishes to framed paint-by-numbers and elegant ribbon edging, these ideas prove that home-made can absolutely mean high style. Whether you’re in a cozy flat or a spacious home, these projects are adaptable, achievable, and grounded in timeless design principles.
Check out easy DIY projects to amp up the luxury vibe of your home…
#1. From Fabric to Fab: Textile DIYs That Look Luxe
Fabric adds personality and warmth to any space. But let’s be honest, designer textiles can cost a small fortune. The good news? You don’t need to empty your wallet to make your throw pillows or cushion covers look bespoke. With a bit of creativity, a few DIY design hacks, the right supplies, and careful attention to detail, you can craft pieces that look custom-made. And expensive.
Textiles are one of the easiest ways to shift the mood of a room. Handmade covers give you total control over the palette, texture, and scale of your decor. A velvet pillow in deep emerald or a hand-painted linen cushion with clean, geometric patterns can instantly elevate a space. These luxury DIY projects offer that level of impact, without the designer price tag.
Project Ideas
- Velvet Throw Pillows: Choose plush velvet in rich jewel tones or subtle neutrals. Sew simple covers with hidden zippers for a polished, store-bought finish.
- Painted Cushion Covers: Use cotton or linen pillowcases as your base. With masking tape or stencils, create bold geometric designs or soft brushstroke patterns using fabric paint.
- Dip-Dyed Throws: Dip the edges of lightweight linen or cotton throws into a dye bath for an effortless ombré effect. Stick to one or two tones for a chic, understated result.
Materials List
- Velvet, linen, or cotton fabric
- Fabric paint or dye
- Stencils, masking tape
- Needle and thread or sewing machine
- Invisible zippers (optional but ideal)
- A large tub or bucket for dyeing
Design Hacks
- Stick with monochrome or two-tone palettes for a modern, elevated look.
- Mix textures—pair velvet with linen, or matte with sheen—for added depth.
- Use invisible zippers or envelope-style closures to keep the finish clean and tailored.
Styling Tips
- Layer pillows in different sizes for visual interest.
- Drape a matching throw casually across a sofa corner to give the room a lived-in, curated vibe.
- Balance hand-painted or DIY pillows with solid store-bought ones for a sophisticated contrast.
- Swap textiles out seasonally to refresh your space without committing to a full redesign.
#2. DIY Abstract Art That Looks Gallery-Worthy

A large-scale piece of artwork can transform a room, anchoring your space with a sense of personality and polish. And while buying original art can be a serious investment, creating your own abstract canvas is far more doable than it seems. With the right tools and an eye for balance, you can craft something that rivals the high-end art for sale in galleries and online stores, minus the hefty price tag.
The magic lies in composition and restraint. Abstract art doesn’t require fine drawing skills but benefits from thoughtful placement, contrast, and texture. The goal is to create pieces that feel deliberate, where every brushstroke, layer, or texture choice contributes to the overall harmony. When done right, the result is sculptural, modern, and beautifully touchable—perfect for accent walls or minimalist interiors where art commands attention.
Project Ideas
- Textured Abstract Canvas: Start with modeling paste or joint compound on a stretched canvas. Use a palette knife to create a raised texture. Once dry, paint over with neutral acrylics like soft white, taupe, or deep charcoal to achieve a minimalist, tactile finish.
- Gold Leaf Accents: Create large color blocks with acrylic paint. Once dry, use painter’s tape to add clean geometric shapes, then apply gold leaf for a luxe focal point.
- Monochrome Series: Choose a single hue and play with its tonal variations across three canvases. Add slight texture to each for a cohesive yet layered visual story.
Materials List
- Stretched canvas (one large or multiple small)
- Neutral-toned acrylic paint
- Modeling paste or joint compound
- Putty knife or palette knife
- Gold leaf sheets and adhesive
- Painter’s tape
- Hanging hardware or a floating frame
Design Hacks
- Embrace loose, intentional brushwork for a sense of movement.
- Don’t aim for perfection. Simplicity and contrast naturally create balance.
- Combine textured and flat areas to keep the piece visually dynamic.
Placement Tips
- Hang above a console, sofa, or bed to serve as a statement piece.
- Keep nearby decor minimal so your artwork can breathe and stand out.
- Use a floating frame to elevate the overall look and create gallery-level impact.
- Consider adding a spotlight or gallery light to highlight texture and elevate the ambiance.
#3. Easy Elegance: Paint by Numbers and Other DIY Projects That Start with a Kit
Not every creative project has to begin from scratch. In fact, some of the most charming and stylish DIYs start with a little help. Paint-by-number kits and small-batch crafts are enjoying a quiet renaissance. And when chosen with intention, they offer a surprisingly elegant way to infuse personality into your home. These projects are especially ideal for beginners or time-strapped creatives who still want that bespoke, hand-touched feel.
Gone are the days when paint-by-numbers were reserved for kids. Today’s kits come in clean, minimalist designs, abstract florals, and earthy palettes that effortlessly blend into modern interiors. When matted and framed thoughtfully—whether in sleek black, soft wood, or a floating frame—they can easily pass for custom art. Add in a few small-scale handmade accents, and you’ve got the perfect formula for a cozy, curated space.
Project Ideas
- Paint-by-Number Artwork: Choose kits that feature abstract designs, floral silhouettes, or simplified landscapes. Stick to muted or earthy tones for a sophisticated finish. Once complete, elevate the look with a wide mat and a minimalist frame, or opt for a floating frame for a gallery-style touch.
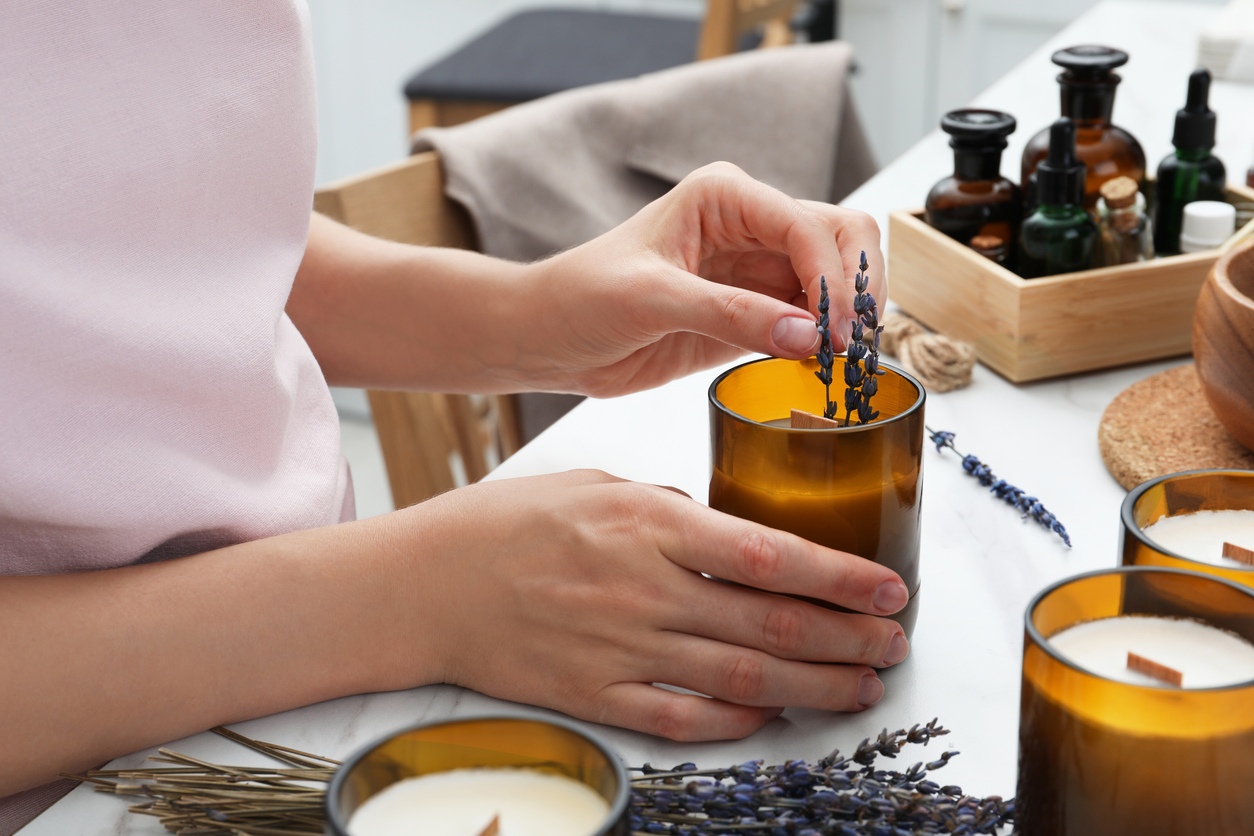
- Handmade Perfumed Candles: Pour soy wax into glass or stone containers. For a luxe feel, use wooden wicks and infuse with elevated scents like sandalwood, cedarwood, or bergamot. The result is a candle that looks and smells boutique-worthy.
- Clay Trinket Dishes: Use air-dry clay to shape shallow bowls or catchalls. Keep the form organic, then paint it in matte tones like black, white, or blush. Add a thin line of gold leaf or paint along the rim or base for an elegant, handcrafted finish.
#4. The Luxe Illusion: DIY Marble Accessories for a High-End Touch

Marble has long been a symbol of opulence—think Roman temples, grand palaces, and statement foyers. When it comes to interiors, however, genuine marble can come with a hefty price tag. Enter faux marble: the budget-friendly hero of luxury DIY projects. With the right tools and techniques, you can recreate the look of real stone for just a fraction of the cost. These camera-ready pieces offer visual depth, sleek sophistication, and a polished finish that elevates any room.
But here’s the golden rule—less is more. Faux marble accessories are most effective when used sparingly. A tray here, a set of coasters there, and suddenly the space feels intentional and refined. The secret lies in choosing understated palettes—think whites, greys, and soft veining—and focusing on finish. Whether matte or glossy, keep it clean, neutral, and minimal for maximum effect.
Project Ideas
- DIY Marble Coasters: Use plain white ceramic tiles as your base. Drip alcohol inks or swirl nail polish in marble-inspired tones—grey, gold, charcoal—for natural-looking veining. Finish with a clear acrylic spray to add gloss and protect the surface.
- Faux Marble Tray: Start with an acrylic or wooden tray. Carefully wrap it in high-quality marble contact paper, smoothing out bubbles with a card for a seamless finish. For a luxe accent, attach gold handles or brackets to complete the look.
Materials List
- White ceramic tiles or wooden/acrylic trays
- Alcohol ink or nail polish
- Marble-patterned contact paper
- Clear acrylic sealant spray
- Optional: gold handles, painter’s tape, adhesive
Styling Tips
- Stick to a tight color palette. White, grey, and gold never fail.
- Pair marble pieces with matte black or brass accents for modern contrast.
- Stack coasters with candles or design books on a side table for visual interest.
- Use a mirrored tray to enhance light and create reflective elegance.
- Style trays on entryway consoles, vanities, or bedside tables for instant glamour.
Conclusion
Luxury isn’t defined by price tags. It’s defined by craftsmanship, intention, and detail. With these four luxury DIY projects, adding polish and personality to your home doesn’t require a mortgage. From the sculptural depth of a textured canvas to the soft opulence of a velvet pillow and the chic gleam of a faux marble tray, each project offers a refined, quietly luxurious touch. They’re timeless, tailored, and thoughtfully designed.
Try one, try them all—and discover the quiet joy of living with something beautiful that you built yourself.
Featured Image: Edward George London
For the latest in fashion, lifestyle, and culture, follow us on Instagram @StyleRave_
—Read also